


 |
Add an Alert
Alerts are based on the group selected. If you want an alert to apply to your entire fleet, select the Enterprise Group, and then create the alert.
To Create an Alert:
1. Select the Alerts tab, and then select the Inactive tab.
• The alert will only trigger when any driver or vehicle in the selected group has an event that meets the predefined alert conditions.
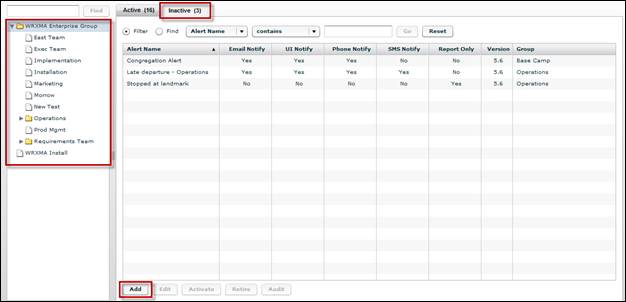
2. Click the Add button.
• The Add Alert screen displays.
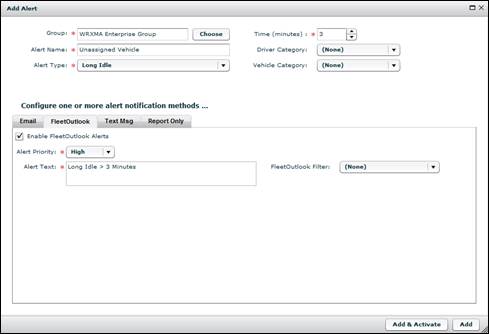
3. If the correct name is not displayed in the Group field, click the Choose button, and then select the correct group from the Change Selection screen.
• If you selected the group from the Enterprise Tree, FleetOutlook automatically populates the Group field with the name of the group selected.
4. Enter an Alert Name.
5. Select an Alert Type from the drop-down list.
• Based on the Alert Type selected, additional options display. For example, if you select a location based alert, you must also select a Landmark Category option and Distance proximity.
6. Select the tab for the preferred Alert Notification Method (e.g., Email).
• You can select one or more alert notifications. For more information on alert notifications, refer to Alert Notification Methods.
7. Select the Enable Alerts check box for each alert notification selected.
8. Based on the Alert Notification Method selected, you must configure options associated with the method, such as entering an email text, subject and address for an email notification.
9. Click the Add & Activate button to add the Alert and immediately activate it.
• Click the Add button to add the Alert and activate it later.
• If you click Add & Activate, FleetOutlook saves the Alert and adds it to the Active Alert list.