


 |
Add or Edit a Vehicle
A vehicle is the basis of most of the organization within FleetOutlook. Each vehicle must have an assigned device to report data in FleetOutlook. While assigning a driver is not required, we recommend assigning a driver to each vehicle. This enables you to associate the vehicle activity with a specific driver and monitor work habits and performance.
To Add or Edit a Vehicle:
1. From the Enterprise Tree, select the group to which you want to add a vehicle.
• You can assign vehicles to one or more groups; however, a vehicle cannot be in more than one exclusive group of the same level in the hierarchy. For example, a vehicle cannot be in two supervisor groups if both of the supervisor groups are exclusive.
2. Select the Vehicles tab.
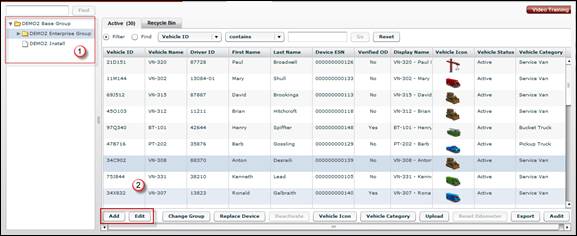
3. Click the Add button.
• The Add Vehicle screen displays. To edit an existing vehicle’s settings, select the vehicle from the Active list, and then click the Edit button. The Edit Vehicle screen displays.
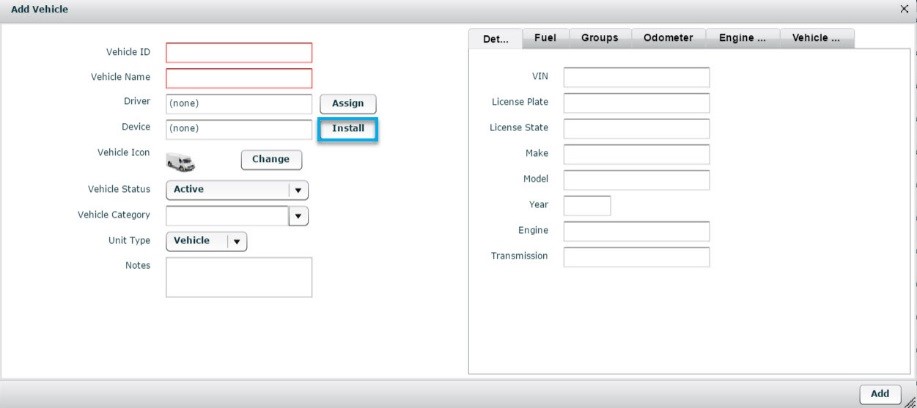
4. Enter the Vehicle ID and Vehicle Name.
• The Vehicle ID is a required field and must be unique. We recommend that you use the last 6-8 digits of the VIN number. If you deactivate a vehicle, you cannot reuse the Vehicle ID for another vehicle.
• The Vehicle Name is a required field and is used to identify the vehicle within the FleetOutlook application.
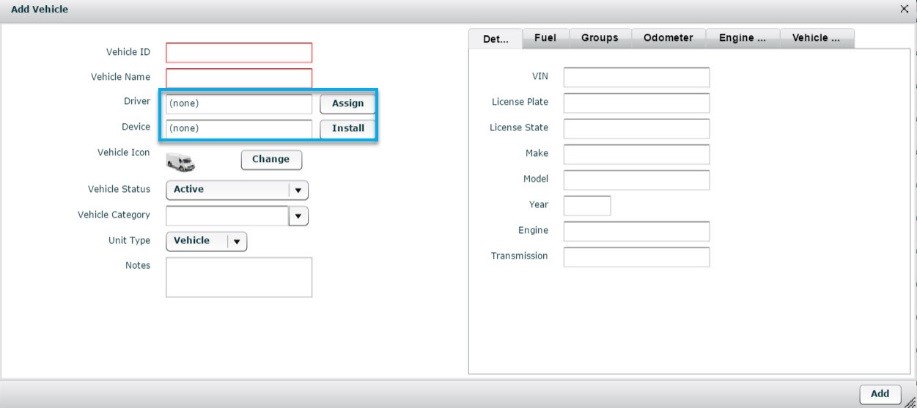
• To assign a driver to the vehicle, create and save the vehicle. Do not assign a driver while creating the vehicle.
• Driver-to-vehicle assignments are not required; however, drivers are used in FleetOutlook to associate vehicle activity to an individual driver. Additionally, several reports are driver focused, where the focus is on driver performance regardless of the assigned vehicle.
5. Click the Install button to assign a device to the vehicle.
• The Install Device screen displays.
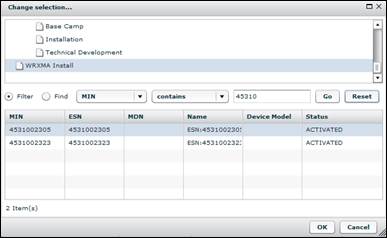
6. From the top pane, scroll to the bottom of the list and select the Install group.
• FleetOutlook displays all of the active devices not assigned to vehicles.
7. Enter the first four digits of the MIN in the MIN field, and then click Go button.
• FleetOutlook populates the list with possible device matches.
• You can only assign devices currently active in FleetOutlook, but not installed on a vehicle.
8. Select the device that you want to assign to the vehicle, and then click the OK button.
• FleetOutlook populates the Device field with the device’s information and assigns the device to the vehicle.
9. Click the Vehicle Icon, and then select a vehicle type and color.
• Refer to Vehicle Icons and Colors for a complete list of available icons and colors.
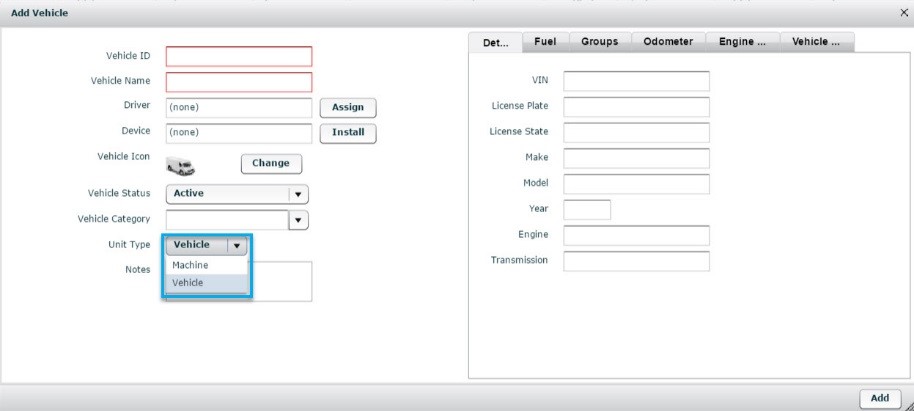
10. Select Machine or Vehicle from the Unit Type drop-down field.
• When Machine is selected, the map tool tip displays the equipment's serial # and cumulative hours of use. The breadcrumb detail displays the engine hours meter instead of the odometer for each event.
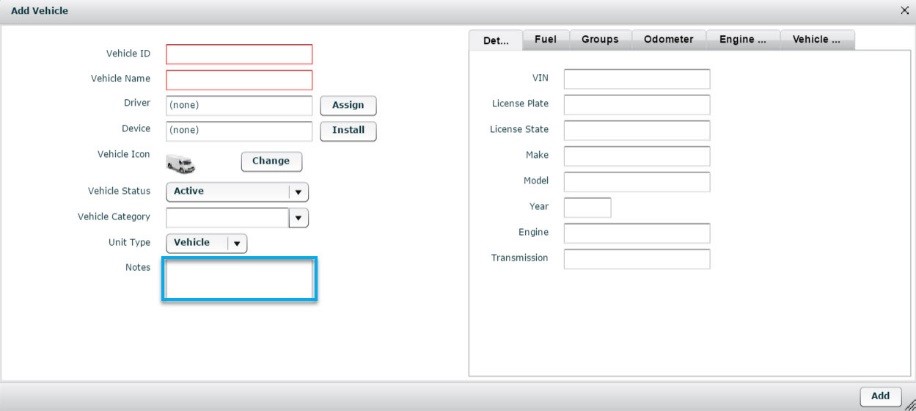
11. If needed, enter custom notes for the vehicle in the Notes field.
12. On the Details tab, populate vehicle identification fields. These fields are not required, but are used in FleetOutlook reports.
13. Select the Fuel tab, and then populate fields based on manufacturer specifications.
• Fuel fields are not required, but are used on the Fuel Efficiency Report, which is available to customers using a device that reports vehicle bus data.

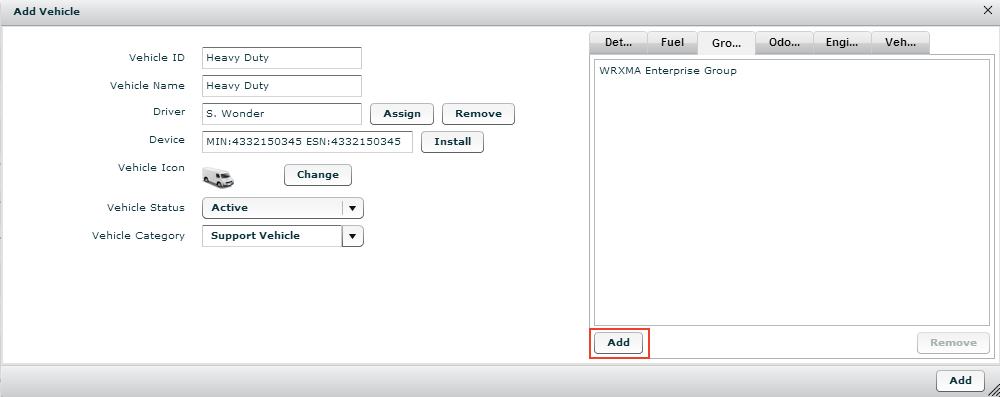
14. Select the Groups tab.
15. Click the Add button located on the lower-left side of the Groups tab.
• Verify that you clicked the Add button associated with Groups tab and not the Add button for the Add Vehicle screen.
• The Choose Groups screen displays.
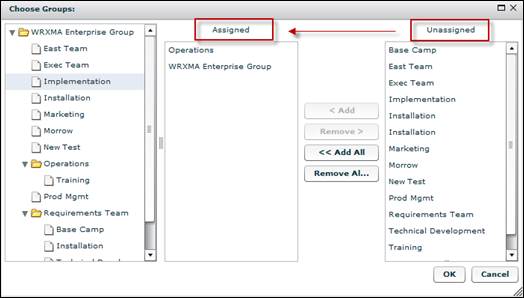
• The Enterprise Tree displays on the far left. The groups currently assigned to the vehicle in the middle and a list of available groups on the far right.
16. Select the Group(s) from the Unassigned list, and then click the < Add button.
• You can also select and add groups from the Enterprise Tree displayed on the left side of the Choose Group screen. You can add multiple groups at once. Use the Shift key to select adjacent groups and the Ctrl key to select non-adjacent groups. A vehicle can only be in one exclusive group within the hierarchy level. An error message displays if you attempt to place a vehicle in two exclusive groups that are on the same level. You can assign the vehicle to as many non-exclusive groups as necessary.
17. When finished assigning groups, click the OK button.
18. Click the Odometer tab.
19. Enter the vehicle’s mileage in the Odometer Reading field.
20. Select the odometer reading Date Taken and Time Taken.
21. Click the Engine Hours tab.
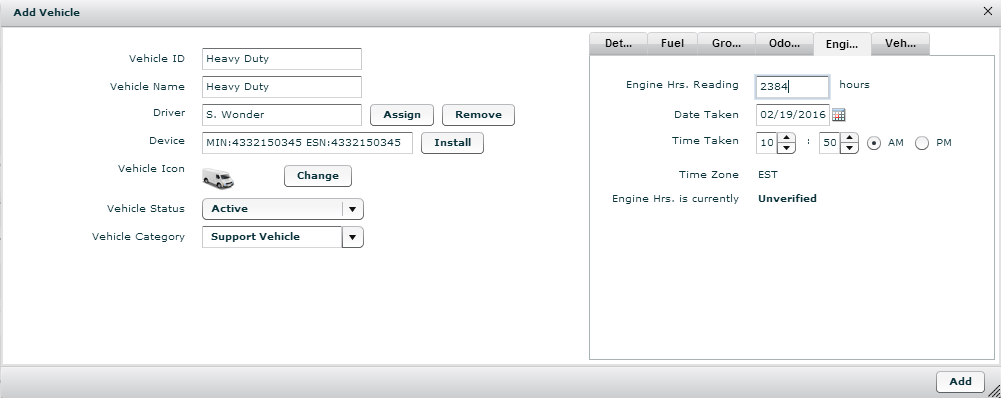
22. Enter the Engine Hours Reading.
23. Select the engine hours reading Date Taken and Time Taken.
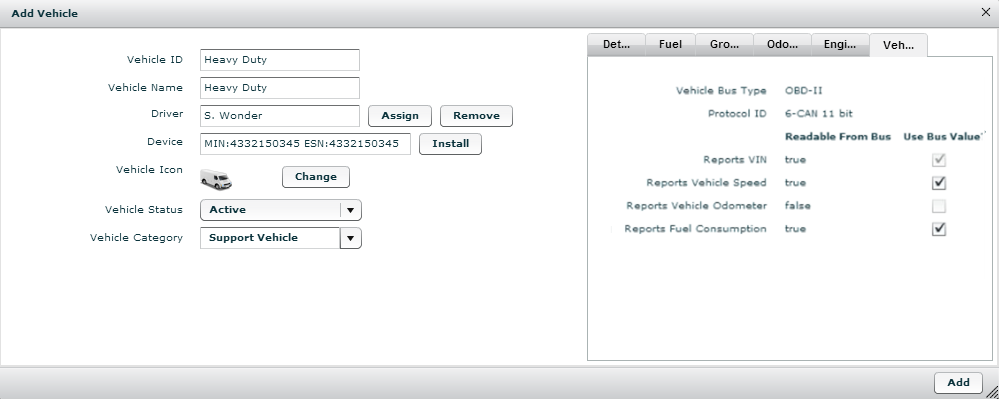
24. If your vehicle has a device that report OBD-II or Jbus data, click the Vehicle Bus tab displays what fields the selected vehicle reports. Select whether to use the reported values from the vehicle bus or data derived from the device.
25. Click the Add button.
• FleetOutlook populates the vehicle on the Active tab. The vehicle will begin reporting location-based data and events (e.g., moving, stop, idle, etc.) in FleetOutlook.